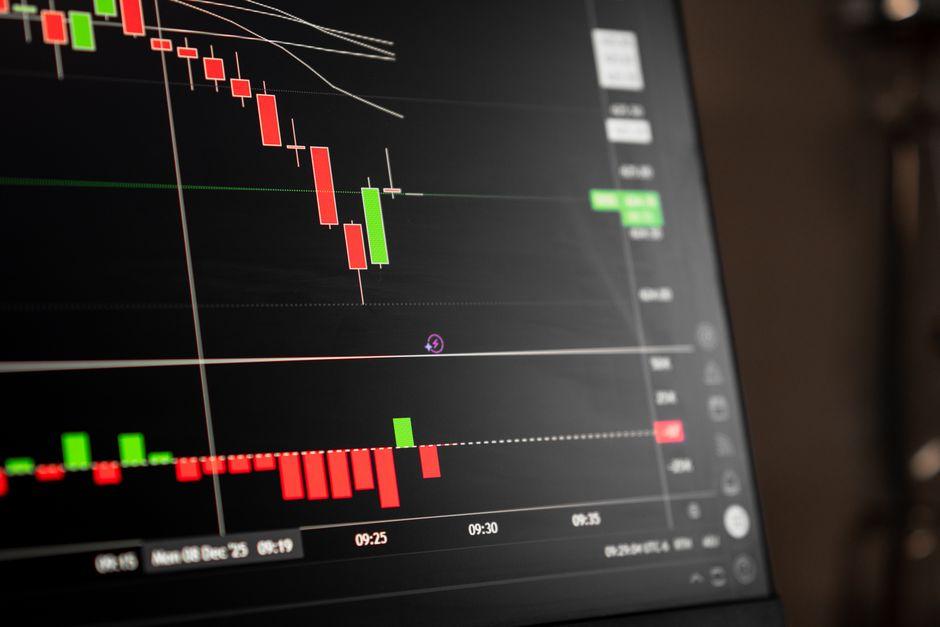
How to Use Price Action on TradingView: Complete Guide

Table of Contents
- Introduction
- What Is Price Action on TradingView
- Why Price Action on TradingView Matters for Traders and Investors
- Core Concepts
- Step-by-Step Guide
- Practical Tips for Better Results
- Common Mistakes to Avoid
- Frequently Asked Questions
- Conclusion
Introduction
A trader watches the S&P 500 pull back to a level that has rejected price three times over the past two weeks. No oscillator flashes a buy signal. No moving average cross confirms the move. The candle closes with a long lower wick, rejecting the level. That is price action. The decision to enter, set a stop-loss, and define a target comes from reading what price is doing right now, not what a formula says it should do.
TradingView has become the default charting platform for retail traders across crypto, forex, equities, and futures. Its drawing tools, multi-timeframe layout, and clean interface make it well suited for naked chart analysis. Yet many users clutter their charts with dozens of indicators before they learn to read price itself. Learning to use price action on TradingView changes that. You stop asking what the RSI says and start asking where the orders are.
This guide covers the mechanics of price action trading using TradingView’s native tools. You will learn how to map support and resistance zones, read candlestick anatomy, draw and validate trendlines, and build a repeatable entry process. Risks are addressed alongside rewards, because price action is a skill, not a guarantee.
What Is Price Action on TradingView?
Price action is the study of raw price movement without relying on lagging indicators. On TradingView, this means using candlestick charts, drawing tools, and volume bars to identify where buyers and sellers are likely to act. The trader reads the chart directly: where price stalled, how aggressively it reversed, whether the breakout held or failed.
TradingView supports this approach through its built-in toolbar. The Rectangle tool marks zones where price has reacted. The Trend Line tool connects swing highs or lows. The Bar Replay feature lets you scroll backward and practice reading candles without seeing the future. Candlestick charts are the default, and you can switch between Heikin Ashi and standard candles depending on your preference.
A concrete example: a trader opens the BTC/USDT 4-hour chart on TradingView, removes all indicators except volume, and identifies a zone between 58,000 and 60,000 where price has bounced twice over the past month. They draw a rectangle across that range. When price returns and forms a bullish engulfing candle at the bottom of the zone, they have a setup. No indicator was needed. The chart told the story.
Why Price Action on TradingView Matters for Traders and Investors
Price action matters because every indicator is derived from price. Moving averages lag. RSI oscillates. MACD crosses after the move has begun. Price itself is the only leading source of information on a chart. Reading it directly gives you faster signals and deeper context than any derivative calculation.
For day traders, price action on lower timeframes reveals intraday liquidity levels where algos and institutional orders cluster. For swing traders, higher timeframe zones on the daily or 4-hour chart identify where multi-day reversals tend to form. Position traders use weekly and monthly structures to time entries that align with broader trends. Each timeframe has its own noise level, and price action teaches you to filter it.
Ignoring price action has a cost. A trader who enters long because the RSI is oversold, without checking whether price is sitting at a major resistance zone, is trading blind to context. Over typical market cycles, traders who rely solely on indicators tend to suffer repeated stop-outs in ranging markets, where oscillators generate false signals but price simply rotates between boundaries. Understanding price action helps you identify the regime first, then choose the right approach.
TradingView specifically matters here because its toolset is designed for visual analysis. The platform’s drawing tools snap to candle wicks and bodies. Multi-chart layouts let you monitor correlated assets simultaneously. The Replay function lets you backtest your reading skills bar by bar. These features make TradingView one of the better environments for developing price action proficiency.
Support and Resistance Zone Mapping Using the Rectangle Tool
Support and resistance are not lines. They are zones. Price does not reverse at an exact number; it reverses within a range where orders accumulate. On TradingView, the Rectangle tool lets you shade these zones visually, which is more honest than drawing a single line that implies precision.
The mechanism is straightforward. Support forms where buying pressure has repeatedly overcome selling pressure. Resistance forms where sellers have repeatedly overwhelmed buyers. The more times price reacts at a zone, the more significant it becomes. Zones that align with round numbers, prior swing highs or lows, or daily open levels tend to carry more weight because that is where participants place resting orders.
Consider a trader analyzing the EUR/USD daily chart. Price has tested the 1.0850 area four times over six weeks, each time forming a wick that rejected lower prices. The trader selects the Rectangle tool from TradingView’s left toolbar, clicks and drags from the highest wick to the lowest wick in that zone, and shades the area between 1.0830 and 1.0870. This is now a visual reference. When price approaches this zone again, the trader watches for a reaction. If price forms a pin bar or engulfing pattern at the top of the rectangle, a short entry with a stop-loss above the zone’s upper boundary becomes a defined setup. If price slices through the zone on high volume, the support is broken, and the trader waits for a retest as new resistance before considering a short.
The Rectangle tool also helps with position sizing. Knowing the height of the zone lets you estimate your risk in price terms. If the zone is 40 pips wide and your stop goes above it, your risk per unit is roughly 50 pips including the zone height plus a buffer. That number feeds directly into your position size calculation.
Candlestick Pattern Anatomy: Pin Bars and Engulfing Patterns on TradingView Charts
Candlesticks are the alphabet of price action. Each candle tells you who controlled the session, where they pushed price, and where they lost control. Two patterns matter more than most for TradingView users: the pin bar and the engulfing pattern.
A pin bar is a candle with a small body and a long wick on one side. The long wick represents rejection. A bullish pin bar has a long lower wick, meaning sellers pushed price down during the session but buyers overwhelmed them before the close. A bearish pin bar has a long upper wick, showing that buyers attempted to push higher but sellers took control. The body should be small relative to the wick, and the close should be near the opposite end of the candle’s range.
An engulfing pattern is a two-candle formation. A bullish engulfing pattern occurs when a small bearish candle is followed by a larger bullish candle whose body completely covers the prior candle’s body. This signals a sudden shift in momentum. A bearish engulfing pattern is the reverse: a small bullish candle swallowed by a larger bearish one.
Here is a concrete scenario. A trader is watching the BTC/USDT 4-hour chart. Price has been declining and approaches a support zone the trader previously marked with a Rectangle between 58,000 and 60,000. The first candle in the zone is a small red candle, closing near 59,200. The next 4-hour candle opens at 59,100 and closes at 60,400, a large green candle whose body completely engulfs the prior candle. This is a bullish engulfing pattern at a major support zone. The trader enters long at the close of the engulfing candle, places a stop-loss below the wick of the engulfing candle at roughly 58,800, and targets the next resistance zone near 64,000. The risk-reward ratio is approximately 1:3 based on the zone distances.
TradingView displays candlesticks by default. You can adjust the chart type by clicking the candlestick icon at the top of the chart and selecting “Candles.” Ensure your time zone is set correctly in the chart settings, because a misaligned time zone can shift candle opens and closes, distorting pattern formation.
Trendline Drawing and Breakout Validation Using the Trend Line Tool
Trendlines are diagonal support or resistance levels. They connect swing highs in a downtrend or swing lows in an uptrend. A valid trendline needs at least three touch points. Two points define a line; the third confirms it. On TradingView, the Trend Line tool sits in the left toolbar, and the platform snaps your line to the nearest wick or body, which reduces imprecision.
The mechanism behind trendlines is order flow. In an uptrend, each higher low represents a level where buyers stepped in. Connecting those lows creates a visual boundary that participants watch. When price approaches the trendline again, traders expect buyers to defend it. If price breaks below the trendline with conviction, those buyers may exit, creating a cascade of selling as stops get hit.
Breakout validation is where most traders fail. A breakout is not valid just because price crosses the line. Valid breakouts tend to have volume confirmation, a strong close beyond the trendline, and a follow-through candle in the breakout direction. Invalid breakouts, or fakeouts, occur when price pokes through the line but closes back inside the trend, trapping early entrants.
A practical example: a trader draws a descending trendline on the EUR/USD 15-minute chart, connecting three lower highs over the past three hours. Price has been making lower lows as well, confirming the downtrend. The trader marks the trendline and waits. Price approaches the trendline from below and breaks above it with a candle that closes well above the line. Volume on that 15-minute candle is visibly higher than the prior five candles. The trader waits for the next candle to confirm. The next 15-minute candle opens above the breakout point and closes higher. This is a validated breakout. The trader enters short on a retest of the broken trendline, which now acts as support, with a stop-loss above the breakout candle’s high. The target is the most recent swing low.
That said, trendlines on very short timeframes like the 1-minute chart are less reliable. Noise dominates, and false breakouts are common. Most experienced price action traders prefer 15-minute or higher charts for trendline-based entries.
Step 1 — Clean Your Chart and Select the Right Timeframe
Open TradingView and load your target instrument. Remove every indicator from the chart. This includes moving averages, RSI, MACD, Bollinger Bands, and any custom scripts. Keep only the volume bar at the bottom, because volume provides context for breakouts and reversals without lagging. Set your chart type to candlesticks.
Choose a timeframe that matches your trading style. Day traders typically work with 5-minute, 15-minute, and 1-hour charts. Swing traders focus on 4-hour and daily charts. Position traders use daily, weekly, and monthly charts. The key decision is consistency. If you are swing trading, do not flip to the 5-minute chart to look for entries. That introduces noise and inconsistency.
One practical approach is the multi-timeframe method. Start on the daily chart to identify the overall trend and major support and resistance zones. Drop to the 4-hour chart to refine those zones. Drop to the 1-hour chart for entry timing. TradingView supports this through its multi-chart layout feature, which lets you view three timeframes side by side.
Step 2 — Map Key Zones and Draw Your Trendlines
With a clean chart, begin identifying zones where price has reacted multiple times. Use the Rectangle tool to shade these areas. Start with the most obvious reactions: places where price reversed sharply, leaving long wicks or large engulfing candles. Mark at least two support zones and two resistance zones on your current chart.
Next, identify the trend. If price is making higher highs and higher lows, draw an ascending trendline connecting the swing lows. If price is making lower highs and lower lows, draw a descending trendline connecting the swing highs. Use the Trend Line tool and ensure the line touches at least three points. If it only touches two, mark it as tentative and wait for a third test.
For traders following a price action strategy, this mapping process is the foundation. Every entry decision should reference these zones and trendlines. If a setup does not align with a mapped level, it is not a trade. This mechanical rule removes the temptation to force entries in the middle of nowhere.
Step 3 — Wait for Confirmation and Execute with Defined Risk
Mapping zones is preparation. Execution requires confirmation. Confirmation means waiting for price to reach your zone and then produce a candlestick pattern that validates your bias.
For a long entry at support, wait for price to enter the zone and form a bullish pin bar or bullish engulfing candle. Enter at the close of the confirmation candle. Place your stop-loss below the wick of the confirmation candle, not at an arbitrary distance. Calculate your position size based on the distance from entry to stop-loss, risking no more than 1 to 2 percent of your account. Define your target at the next resistance zone or at a minimum 1:2 risk-reward ratio.
For a short entry at resistance, the process is inverted. Wait for a bearish pin bar or bearish engulfing candle. Enter at the close. Stop-loss goes above the wick. Target the next support zone.
For trendline breakouts, wait for the breakout candle to close beyond the trendline. Check volume. Wait for a retest of the trendline from the other side. Enter on the retest with a stop-loss beyond the breakout candle’s extreme. This two-step confirmation, breakout plus retest, filters out many false signals.
TradingView’s Bar Replay tool is useful for practicing this step. You can scroll back in time, hide future candles, and walk forward bar by bar, testing whether you would have correctly identified the confirmation candle and managed the trade.
Practical Tips for Better Results
- Use the Bar Replay feature on TradingView to practice reading candles without seeing the future. Scroll back 200 candles, hide the right side of the chart, and advance one candle at a time. Decide what you would do at each step. This builds pattern recognition faster than live trading.
- Set TradingView’s time zone to match the exchange you are trading. A candle that forms at 9:00 AM New York time on the NYSE looks different from one that forms at 9:00 AM London time. Misaligned time zones shift candle opens and closes, which can distort pin bar and engulfing pattern identification.
- Save your chart layouts as templates. TradingView lets you save a layout with all your drawings intact. Create one layout per instrument or per strategy. This prevents you from redrawing zones every time you open the platform.
- Use the multi-timeframe layout to confirm direction. If the daily chart is in a downtrend, prioritize short setups on the 4-hour chart. Trading against the higher timeframe trend increases the probability of being stopped out, even if the lower timeframe pattern looks clean.
- Watch volume on confirmation candles. A bullish engulfing pattern on low volume is less convincing than the same pattern on volume that is clearly above the recent average. TradingView’s volume bars are color-coded, making it easy to spot relative volume at a glance.
- Set price alerts at your mapped zones. TradingView lets you create alerts that trigger when price crosses a specific level. Instead of staring at the chart for hours, set an alert at the top of your support zone and step away. When the alert fires, return to the chart and look for confirmation.
- Keep a trading journal with screenshots. TradingView has a built-in snapshot tool. Capture your chart at entry, at stop-loss or target, and review these weekly. Patterns in your mistakes become visible only when you review them systematically.
Common Mistakes to Avoid
- Drawing support and resistance as single lines instead of zones. Price rarely reverses at an exact level. A single line creates false precision and leads to stops being triggered by normal wick noise before the actual reversal occurs.
- Entering before confirmation. Seeing price reach your zone and entering immediately, without waiting for a candlestick pattern to close, is anticipatory trading. The zone might break. The candle might close as a doji. Waiting for the close removes ambiguity.
- Using timeframes that are too low. On the 1-minute chart, noise dominates and candlestick patterns have low predictive value. Most professional price action traders avoid anything below the 5-minute chart, and many prefer 15-minute or higher for entries.
- Ignoring the higher timeframe trend. A bullish engulfing candle at support on the 15-minute chart is a weak signal if the daily chart is in a strong downtrend. Higher timeframe context overrides lower timeframe patterns.
- Moving your stop-loss to avoid being stopped out. If price hits your stop, the trade idea was wrong. Moving the stop turns a defined-risk trade into an open-ended loss. This is one of the most common ways traders blow up accounts.
- Overtrading by forcing setups in the middle of a range. If price is not at a mapped zone or trendline, there is no setup. Patience is a skill. Traders who enter because they are bored, not because the chart offers an edge, lose money over time.
How to use price action on TradingView for beginners?
Start by removing all indicators from your chart except volume. Switch to candlestick chart type. Learn to identify support and resistance zones using the Rectangle tool, then practice spotting pin bars and engulfing patterns at those zones. Use the Bar Replay feature to practice without financial risk. Begin on the 4-hour or daily chart, where noise is lower and patterns are more reliable. Do not trade live until you can consistently identify zones and confirmation candles in replay mode.
What are the best TradingView tools for price action analysis?
The three most useful native tools are the Rectangle tool for zone mapping, the Trend Line tool for trend identification and breakout validation, and the Bar Replay feature for practice. The Horizontal Line tool is also useful for marking key levels like daily opens or prior day highs and lows. Volume bars, which are built into the chart by default, provide essential context for breakout confirmation. The Snapshot tool helps with journaling and review.
Why does price action fail on very low timeframes?
On 1-minute and 2-minute charts, price movement is dominated by noise: algorithmic rebalancing, spread widening, and random order flow. Candlestick patterns that form on these timeframes have low statistical reliability because the signal-to-noise ratio is poor. Support and resistance zones are thinner and break more easily. Most experienced traders use 15-minute or higher charts for price action entries, reserving lower timeframes only for precise entry timing after a higher timeframe setup has been identified.
When to enter a trade based on price action confirmation?
Enter at the close of the confirmation candle. For a long entry at support, the confirmation candle is a bullish pin bar or bullish engulfing pattern that closes within or above your support zone. For a short entry at resistance, the confirmation candle is a bearish pin bar or bearish engulfing pattern that closes within or below your resistance zone. For trendline breakouts, enter on the retest of the broken trendline after the breakout candle has closed with above-average volume. Entering before the candle close introduces uncertainty, because the candle can change shape dramatically in its final minutes.
Can TradingView automatically detect candlestick patterns?
Yes, TradingView has built-in candlestick pattern detection. You can access it through the Indicators menu by searching for “Candlestick Pattern.” The platform can detect common patterns like doji, engulfing, hammer, and shooting star. That said, automatic detection is a starting point, not a substitute for manual analysis. The tool does not consider context, meaning it will flag an engulfing pattern in the middle of a range with the same emphasis as one at a major support zone. Always confirm that the pattern occurs at a meaningful level before acting on it.
Is price action trading profitable without indicators?
Price action trading can be profitable without indicators, but profitability depends on the trader, not the method. Price action provides an edge by focusing on leading information rather than lagging calculations. But edge only translates into profit when combined with disciplined risk management, patience to wait for high-quality setups, and the psychological resilience to follow rules through losing streaks. Many successful traders combine price action with one or two indicators for confirmation, such as volume or a higher timeframe moving average for trend direction. The absence of indicators does not guarantee success. Consistent execution of a tested process does.
Conclusion
The single most important lesson in price action trading is that context determines value. A bullish engulfing candle at a tested support zone is a trade. The same candle in the middle of a range is noise. Zones first, patterns second, execution third. That sequence is what separates traders who read the chart from those who react to it.
Your next step is practical. Open TradingView, pick one instrument you trade regularly, clean the chart, and map support and resistance zones on the daily and 4-hour timeframes. Use Bar Replay to practice identifying confirmation candles at those zones for at least 50 setups before risking capital. Document each one with a screenshot and note whether you would have entered, where your stop would have gone, and what happened next.
Trading involves substantial risk of loss. No method, including price action analysis, guarantees profitable results. Past performance in backtesting or replay does not indicate future performance. Never risk more capital than you can afford to lose, and always use stop-loss orders to define your risk before entering any trade.
—
This article is for educational purposes only and does not constitute investment advice. Trading and investing carry risk of loss; never invest more than you can afford to lose.
Last reviewed: August 2026