Price Action Explained Step by Step: A Trader’s Guide

Trading: A Practitioner’s Guide to Reading the Chart
Table of Contents
- Introduction
- What Is Price Action
- Why Price Action Matters for Traders and Investors
- Core Concepts
- Step-by-Step Guide
- Practical Tips for Better Results
- Common Mistakes to Avoid
- Frequently Asked Questions
- Conclusion
Introduction
Consider what just happened on a EUR/USD chart during a London session. Price walked up to 1.0972, tagged the prior swing high, then reversed hard. A bearish engulfing candle closed back below 1.0950, and the pair dropped toward 1.0880 over the next few sessions. No headline moved that move. No indicator flashed first. The market simply showed its hand through candlesticks, structure, and the resting orders above old highs. That is price action trading in its rawest form.
Most retail traders stare at charts covered in oscillators, moving averages, and arrows that promise certainty. What they often miss is that every indicator on the screen is a derivative of price itself. Reading price action directly removes the middleman. It forces the trader to ask what buyers and sellers are actually doing on each bar, why a level held or failed, and where the next decision point sits. Done well, it produces a repeatable decision framework that works across forex, equities, crypto, and futures.
This guide walks through the mechanism step by step, from candlestick anatomy to trade execution, using two concrete scenarios, EUR/USD and Apple, to anchor each concept. The goal is not a magic setup. The goal is a structured way of reading a naked chart so the entries, stops, and targets all come from the same source of truth: price.
What Is Price Action
Price action is the study of raw price movement on a chart, typically using candlesticks or bars, without relying on lagging indicators to generate signals. Each candle records four data points for a chosen timeframe: the open, the high, the low, and the close. The shape, size, position, and sequence of those candles tell a story about the balance between buyers and sellers.
A simple example: a long-tailed candle that closes near its low after testing a known resistance level suggests sellers defended the zone and absorbed buying interest. A series of higher highs and higher lows, each closing near its high, signals aggressive buyers. Price action traders read these sequences as a live order flow narrative, then plan trades around the levels where that story is most likely to continue or reverse.
Why Price Action Matters for Traders and Investors
Price action is the foundation under every chart. Moving averages, RSI, MACD, Bollinger Bands, and even volume profiles are calculated from the same open, high, low, and close data. If the underlying price action is misread, every indicator built on top of it is misread too. That is why floor traders, systematic funds, and discretionary swing traders all keep returning to the same four numbers on every chart.
Three practical reasons it matters:
– It works across markets. The same candlestick mechanics that drive EUR/USD also drive AAPL, gold futures, Bitcoin, and the S&P 500. A trader who learns price action does not have to relearn a new toolset per asset, and the rules of supply, demand, and liquidity translate with minimal adjustment.
– It forces context. A candlestick signal is meaningless without structure. Reading price action means asking whether a signal appears in the direction of the higher-timeframe trend, against a major supply zone, or in the middle of a range. Context decides whether a setup is tradeable.
– It speeds up decision-making. There is no waiting for an oscillator to cross or a histogram bar to expand. The decision tree is shorter: where is structure, where is liquidity, and what did the most recent candle do relative to both.
Ignore price action and the trader is trading the derivative, not the source. Indicators can help with filters and confluence, but they should never replace reading what price is actually doing.
Candlestick Anatomy and the Bid-Ask Footprint
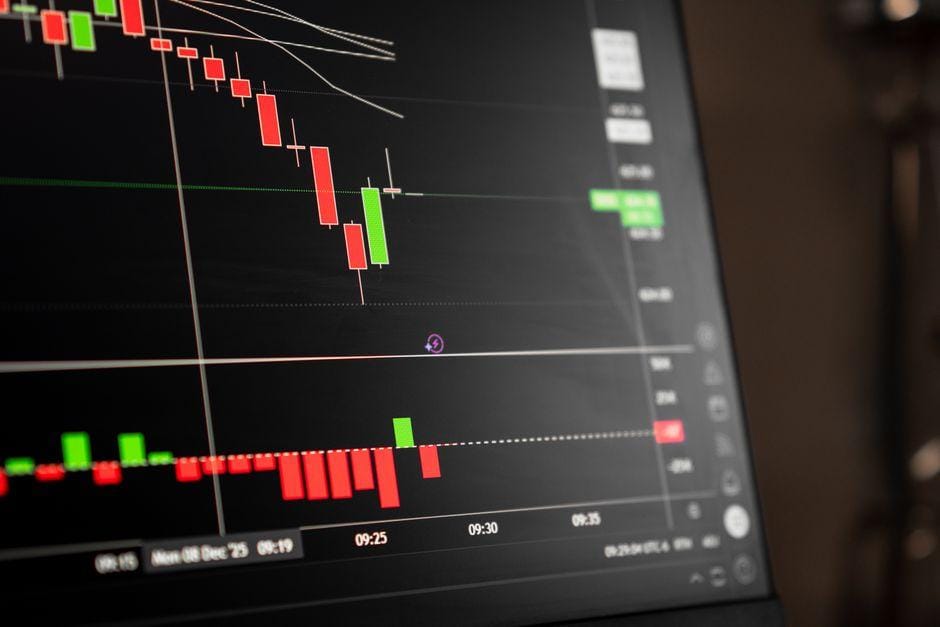
Every candlestick tells the trader who was in control during its timeframe. The body shows the distance between open and close. A green or white body means buyers closed higher than they opened. A red or black body means sellers closed lower. The wicks, or shadows, show the extremes reached and how far price traveled before being rejected.
What most beginners miss is that each wick is a record of rejected orders. A long upper wick on a five-minute candle after a rally into resistance means sellers stepped in at the highs and forced price back down. The lower wick on a hammer-type candle means buyers defended a level and absorbed the selling.
Picture EUR/USD climbing into the 1.0950 supply zone during the London open. A candle pushes to 1.0960, then closes at 1.0942 with a long upper wick. That wick is the visible footprint of sell orders resting at 1.0950. The longer the wick relative to the body, the louder the rejection. A trader reading this correctly will not chase the long; they will look for shorts against the wick on the next retest, with a stop just above the high of the rejection candle.
Support, Resistance, and Market Structure Shifts
Support and resistance are levels where price has historically reversed or stalled. They are not lines drawn once and forgotten. They are zones built from repeated reactions, and they evolve as the market shifts.
Market structure is the sequence of swing highs and swing lows. In an uptrend, price prints higher highs and higher lows. In a downtrend, lower highs and lower lows. A market structure shift, often called an MSS or break of structure, occurs when a previous swing high is taken out in a downtrend (suggesting reversal up) or a swing low is broken in an uptrend (suggesting reversal down).
Take Apple on the daily chart. AAPL consolidates between $180 and $195 for several weeks. A strong daily candle closes above $195 on rising volume. That close is a market structure shift: the prior range high has been broken. A textbook price action entry waits for a retest of the breakout level. If price pulls back to $195 and prints a daily hammer with a higher low, a long entry toward $210 becomes reasonable, with a stop below the retest low. The trade is built entirely from structure, not from a moving average cross.
Supply and Demand Zones vs Order Blocks
Supply and demand zones describe areas where aggressive orders were concentrated, often marked by a sharp move away from a tight base. Order blocks are a related concept that identifies the last opposing candle before a strong impulsive move. Functionally, both point to the same idea: zones where institutional-sized orders likely remain resting.
The difference is in the framing. Supply and demand traders mark the entire base before the move. Order block traders zoom in to the single candle that preceded the impulse. Both approaches aim to find areas where a future retest could produce a new move in the original direction.
A practical scenario: EUR/USD drops sharply from 1.1000 to 1.0880 in a single session, leaving behind a visible demand zone around 1.0980 to 1.0990. Weeks later, price returns to that zone. A trader looking for longs does not buy blindly. They wait for a price action confirmation on the lower timeframe, such as a bullish engulfing or a break of short-term structure, before entering. Without that confirmation, the zone is just a level on a chart.
Liquidity Sweeps and Stop Hunts
Liquidity sits at obvious levels: above swing highs, below swing lows, at round numbers, and on the wrong side of breakouts. Large participants often need that liquidity to fill their orders, so they push price just beyond the level, trigger the stops, and reverse.
A liquidity sweep is one of the most reliable price action patterns once a trader learns to spot it. Price takes out a prior high on a long upper wick, then closes back below it. The wick is the sweep. The close back inside the range is the signal.
Returning to the EUR/USD example: price taps 1.0972, a prior swing high, on a long wick, then closes back inside the prior range. That wick above 1.0972 is liquidity, and the reversal that follows is a textbook setup for a short toward 1.0880. The stop goes above the wick high. The risk is defined before entry, and the trade idea comes from price, not from a stochastic crossover.
Trend, Range, and Transition Market Regimes
Most traders lose money because they apply trend strategies in ranges and range strategies in trends. Identifying the regime is half the battle.
– Trend regime: clean sequence of higher highs and higher lows (uptrend) or lower highs and lower lows (downtrend). Trade pullbacks in the direction of the trend. Avoid mean-reversion signals against the dominant move.
– Range regime: price oscillates between clear support and resistance, with failed breakouts at both ends. Trade the boundaries, not the middle. Stop runs at the edges are common.
– Transition regime: structure is breaking down, the previous trend is losing steam, and a new direction has not been confirmed. This is the highest-risk environment. Many traders reduce size or stay flat until a new structure shift is confirmed on a higher timeframe.
Apple in the $180 to $195 zone is a range regime. The breakout to $195 followed by a successful retest is a transition into a new uptrend. Recognizing the shift from range to trend changes the playbook from selling resistance to buying pullbacks.
Higher-Timeframe Confluence and Context
A signal on a five-minute chart means little if the daily chart is pressing into a major supply zone. Higher-timeframe confluence means aligning the trade with what the bigger participants are likely looking at.
The standard process is to start on the daily or four-hour chart, mark the obvious levels: major swing highs, swing lows, round numbers, and zones of consolidation. Then drop to the 15-minute or 5-minute chart and look for price action signals at those levels. If the higher timeframe is bullish and price is pulling back into demand on the lower timeframe, that is a high-confluence trade. If the higher timeframe is pressing into resistance and the lower timeframe is flashing a bullish signal, that is a lower-confluence trade, often better left alone.
This is also how risk is sized. A high-confluence setup can justify a slightly larger position. A low-confluence setup in a transition regime should be skipped or traded at minimum size. The same logic applies to Treasury yields, the VIX, and equity index futures: stacking decisions on top of a clean higher-timeframe read tends to improve the risk-reward arithmetic, while fighting that read tends to bleed accounts slowly.
Step-by-Step Guide
The following sequence turns the concepts above into a repeatable workflow. Each step answers a question a trader is actually asking in real time.
Step 1 — Identify the Higher-Timeframe Bias
Open the daily or four-hour chart. Mark the last major swing high and swing low. Ask: is the market making higher highs and higher lows, or lower highs and lower lows? If neither pattern is clear, the market is in transition and caution is warranted. Write the bias down: bullish, bearish, or neutral. This single decision filters out roughly half the noise on the lower timeframe.
Step 2 — Mark Key Levels and Zones
On that same higher-timeframe chart, identify the obvious liquidity pools: the most recent swing high, the most recent swing low, the nearest round number, and any supply or demand zones the market left behind. These are the levels where the next decision is likely to occur. Do not clutter the chart with minor levels. Three to five zones are usually enough.
Step 3 — Drop to the Lower Timeframe and Wait for Price to Reach a Level
Switch to a 15-minute or 5-minute chart. Do nothing until price approaches one of the marked levels. The discipline of waiting is where most traders fail. Boredom-driven entries in the middle of nowhere are the most common cause of losses.
Step 4 — Watch for a Price Action Trigger
At the level, watch how the candles behave. Look for a rejection (long wick), an engulfing pattern, a market structure shift on the lower timeframe, or a clean breakout and retest. If none of these appear, do not enter. A level without a trigger is a level, not a trade.
Step 5 — Define Risk Before Entry
Place the stop at the point where the trade idea is invalidated. For a long off a demand zone, the stop goes below the zone or below the wick of the trigger candle. For a short off resistance, the stop goes above the wick. The stop should be tight enough that a loss is a small percentage of account equity, typically defined before the position is sized.
Step 6 — Scale Out and Manage the Trade
Take partial profit at the first opposing level. Move the stop to breakeven once price moves in favor by roughly one times the initial risk. Trail the stop behind subsequent swing lows (in a long) or swing highs (in a short) as the move develops. The goal is to let winners run without giving back open profit.
Practical Tips for Better Results
- Trade the level, not the candle. The same engulfing pattern at a major supply zone is a high-probability short. The same pattern in the middle of a range is noise. Context decides value.
- Use a multi-timeframe checklist, not more indicators. Daily for bias, four-hour for levels, 15-minute for trigger. Three timeframes, one decision.
- Wait for the candle to close. Real-time wicks look meaningful and then disappear at the close. A signal is only valid on a closed bar.
- Keep a journal of the chart, the setup, and the outcome. Patterns in personal behavior show up faster than patterns in price.
- Mark obvious liquidity on every chart before trading it. If the trader cannot quickly point to where the stops are sitting, they are trading blind.
- Reduce size during transition regimes. When structure is unclear, survival matters more than opportunity.
- Practice on a simulator first. Reading price action is a skill, and skills degrade under live capital pressure until they are built.
Common Mistakes to Avoid
- Trading without a higher-timeframe bias. Lower-timeframe signals that fight the daily trend fail more often than they work.
- Marking too many levels. A chart with thirty lines and zones is no different from no levels at all. Focus on the three to five that matter.
- Skipping the trigger. Buying a demand zone because it is there, without waiting for a price action confirmation, is how accounts get ground down.
- Moving the stop to avoid a loss. The stop is the price at which the trade idea is wrong. Moving it away from a level is moving it away from logic.
- Overtrading. Not every session produces a setup. Sitting out is a position.
- Confusing a wick with a breakout. A long upper wick that closes back below resistance is rejection, not a breakout. Reading it the other way around is a fast way to get stopped out on the wrong side.
How do beginners learn price action trading?
Start with a single market, one higher timeframe for context, and one lower timeframe for execution. Spend the first few weeks only marking structure and levels, not trading. Add triggers only after consistently identifying swing highs, swing lows, and liquidity pools on a naked chart.
What is the best price action strategy for day trading?
There is no single best strategy, but a high-probability framework combines a higher-timeframe bias, a marked supply or demand zone, and a lower-timeframe trigger such as a market structure shift or engulfing candle. Most losing day traders skip at least one of those three steps.
Why is price action better than indicators?
Indicators are derived from price. If the trader can read price directly, they remove a layer of interpretation and lag. Indicators can still help with filters, but treating them as the primary signal means reacting to a smoothed version of what already happened on the chart.
When should you enter a trade using price action?
Enter when price reaches a pre-identified level and prints a confirming trigger candle, in the direction of the higher-timeframe bias. If the level and the trigger are not both present, the trade is not ready.
Can price action work in forex and stocks?
Yes. The mechanics of candles, structure, and liquidity are universal. EUR/USD, AAPL, and gold futures all show the same patterns because they all respond to the same underlying force: the balance of buy and sell orders.
Is price action enough to be a profitable trader?
It can be, but only when paired with disciplined risk management, position sizing, and emotional control. Price action gives the signals. Risk management decides whether the trader keeps the profits those signals produce.
Conclusion
The single most important lesson is that the chart is the only source of truth that does not lie. Indicators repaint, news can be misinterpreted, and economic data can be revised. The candle, the structure, and the liquidity on the chart are what they are in the moment they print.
The practical next step is to open one chart tonight, strip it of all indicators, and mark the last swing high, the last swing low, and the obvious supply and demand zones. Do that on three different instruments: a major forex pair, a large-cap stock like AAPL, and a futures contract or crypto pair. If the levels look similar across all three, the trader is starting to read the market rather than the indicator.
Trading carries real risk, and no method, including price action, removes it. Position sizing, stop placement, and capital preservation are what keep a trader in the game long enough for an edge to matter. Treat price action as a decision framework, not a guarantee, and the work compounds. Past performance in any market, from the Nasdaq to the FX desks in London, has never guaranteed future returns, and the same caution applies to any strategy built on the chart.
—
This article is for educational purposes only and does not constitute investment advice. Trading and investing carry risk of loss; never invest more than you can afford to lose.
Last reviewed: 2026